Installation Guide
A step-by-step guide to deploying the software on your server.
Server Requirements
Before you begin, ensure your hosting environment meets these requirements:
- PHP 8.0 or higher
- MySQL or MariaDB
- PDO, MBString & JSON
- ZIP Extension (For Updates)
Upload & Prepare Database
1. Upload the Jobcard Manager Pro ZIP file to your server (usually inside public_html) and extract it.
2. Log in to your hosting control panel (e.g., cPanel), create a new, empty MySQL database, and note down the Database Name, User, and Password.
System Requirements Check
Open your browser and navigate to your domain. The installer will automatically intercept the traffic and verify your server compatibility.
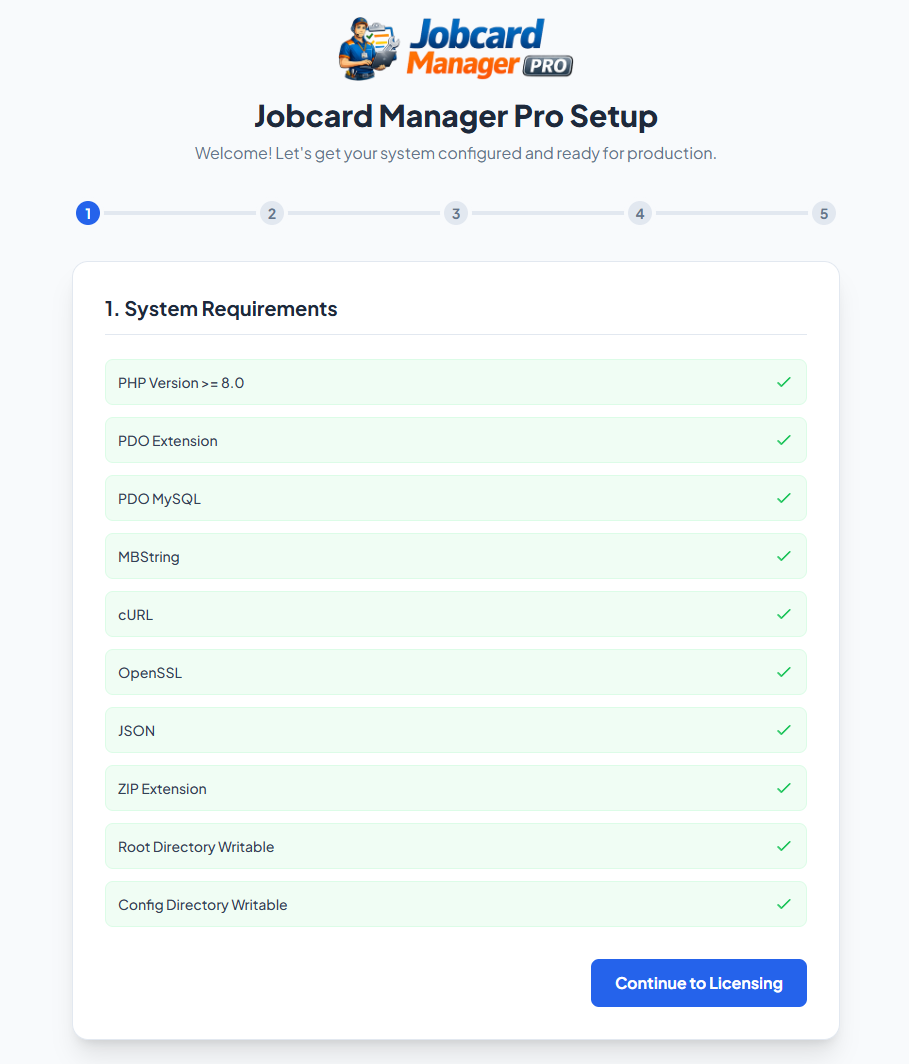
Automated System Requirements Check
Software Registration
Enter your official License Key to activate the software. If you do not have one, a link is provided to request a trial or purchase a permanent license.
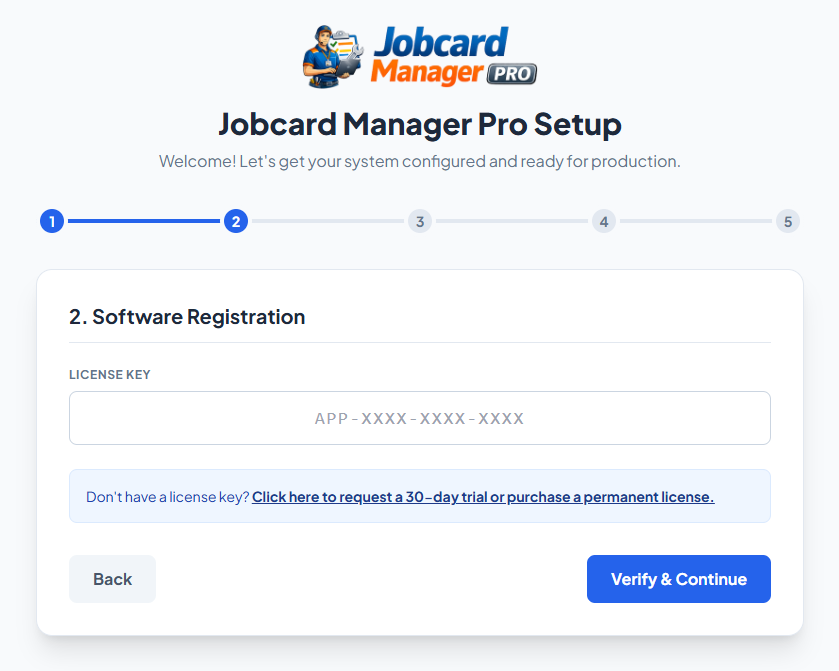
Activating the License Key
Database Connection
Enter the Database Credentials you created earlier. The installer will automatically connect, provision the tables, run migrations, and generate your secure .env file via an animated background process.
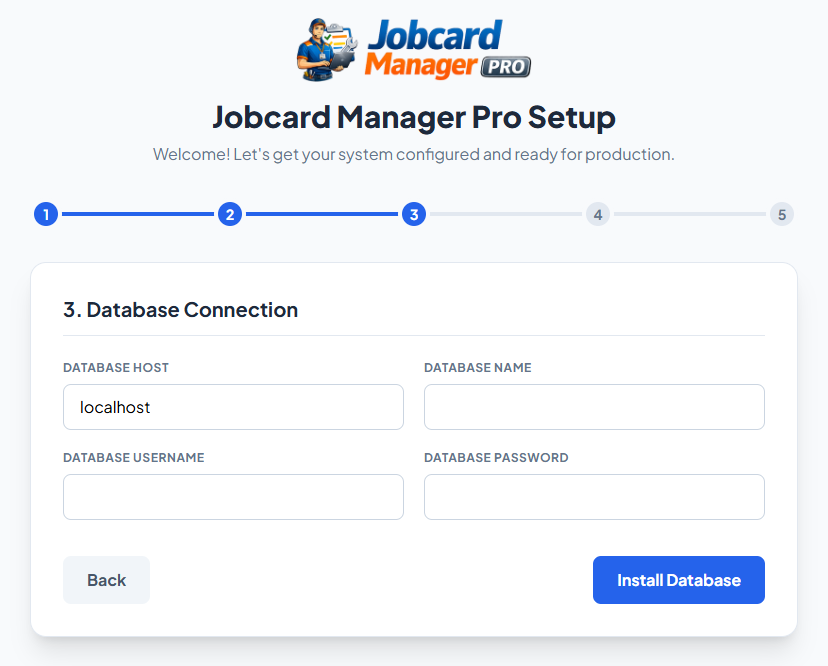
Automated Database Provisioning
System Configuration
Create your Master Administrator account. You can also configure your Company Address and SMTP email server settings here, or skip them and update them later from the dashboard.
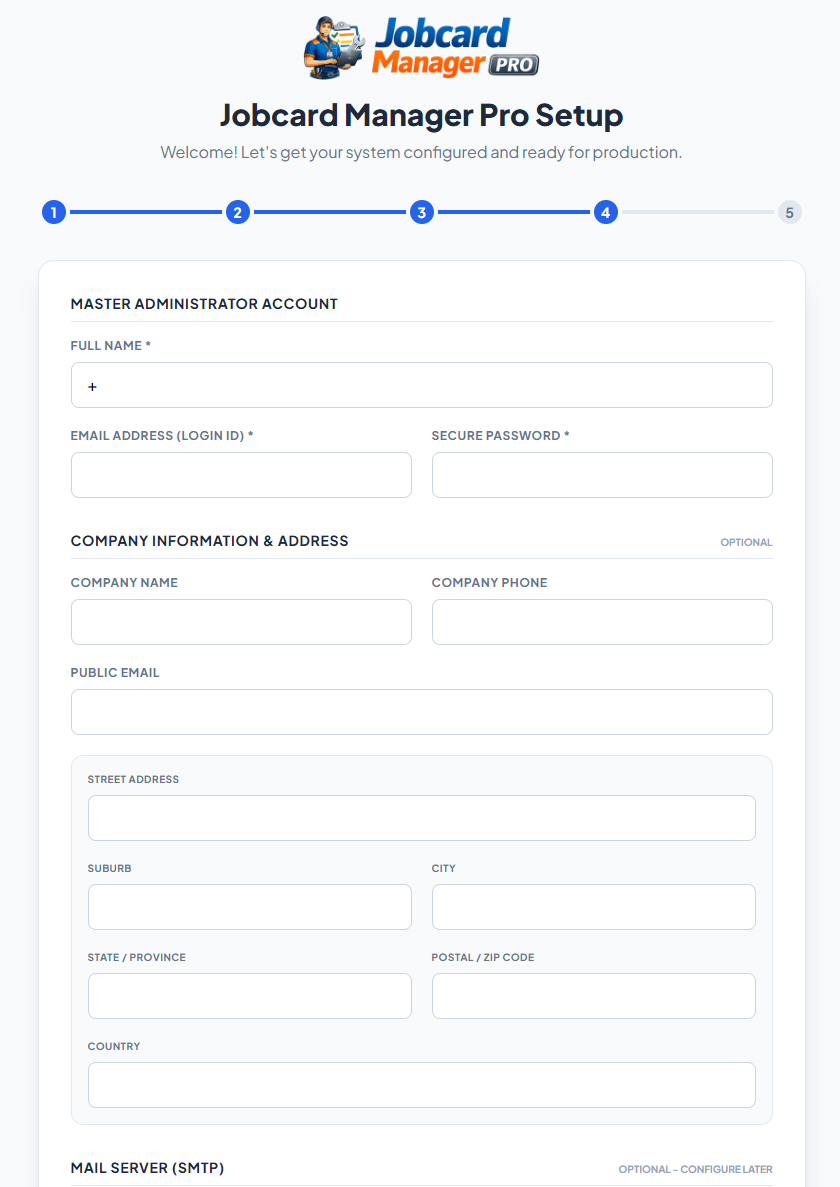
Setting up the Admin Profile & System Variables
Installation Complete
Your application is successfully configured and ready to use!
Security Note: Because the installer successfully generated your `.env` file, the installation wizard is now permanently locked out. You do not need to manually delete any folders.
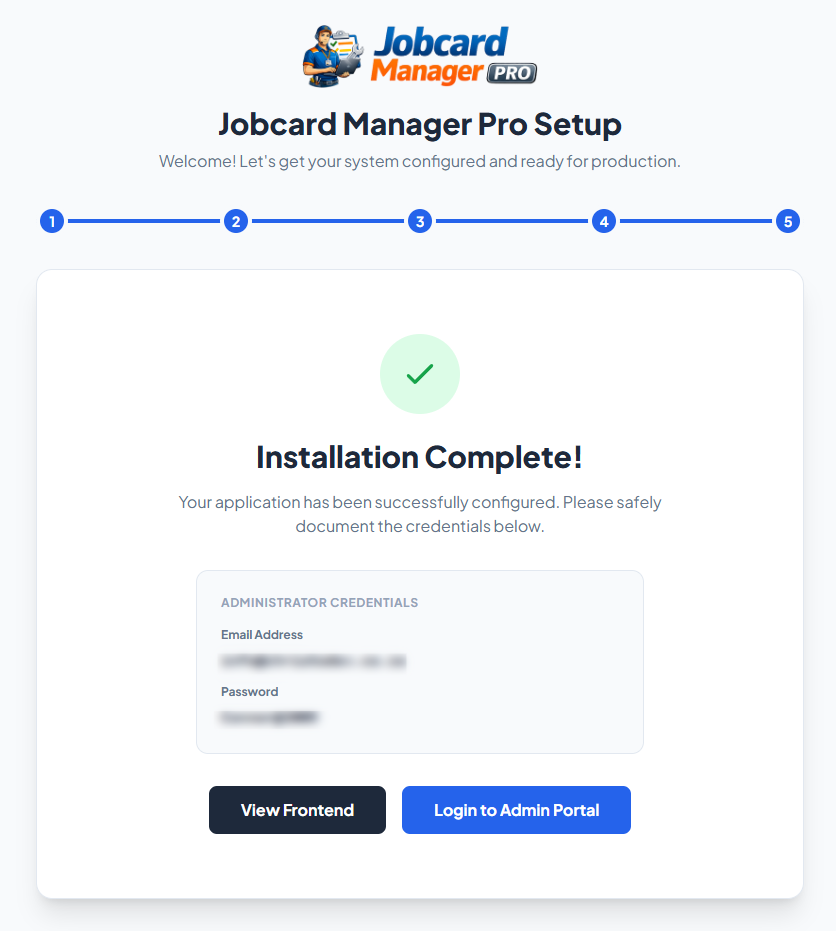
Success Screen & Login Portals